Changing the hostname in
Packet Tracer is a fundamental task for networking professionals and students.
The hostname helps in identifying devices within a network, making management
and troubleshooting more efficient. Whether you're configuring a simple network
or preparing for a certification exam, mastering this basic skill is essential.
In this guide, we will walk you through the steps to change the hostname in
Packet Tracer, ensuring you understand each part of the process. By following
these instructions, you'll be able to customize your network devices with ease
and precision.
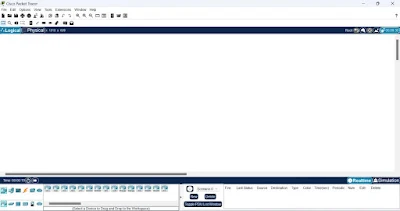
At first, open your Packet
Tracer, then take any router from Network devices. Click on the Router and then
select CLI. Please see the below screenshot.
RELATED POSTS:
- How to Clear Command Prompt in Cisco Packet Tracer
- How to Delete in Packet Tracer
- How to Add Label in Cisco Packet Tracer
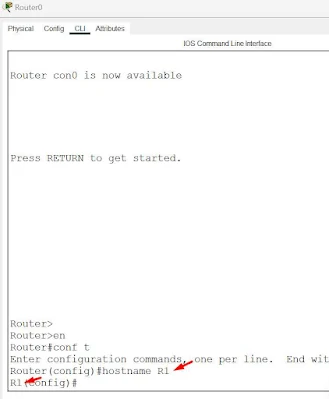
Then write those commands to
enter the Global Configuration and Router Configuration mode. As you are a CCNA
student you know those commands I assume this. If you don’t know those commands
you don’t need to worry about it. Please follow the screenshot below.
Figure: Global configuration mode
RELATED POSTS:
- What Is Cisco Packet Tracer Font Size?
- How to Find Cisco Packet Tracer Font Size
- Best CCNA Online Course: Pass Cisco CCNA 200-301 on Your First Try
So now to change the
hostname you have to write the command “hostname” and then set the Router name to
R1. “Router is the default hostname” and “R1” is the changed hostname. Please
follow the below command How to Change
Hostname in Packet Tracer
Router>
Router>en
Router#conf t
Enter configuration commands, one
per line. End with CNTL/Z.
Router(config)#hostname R1
R1(config)#
By following these simple steps, you can easily change the hostname in Packet Tracer. This fundamental skill enhances network organization and management. Practice regularly to become proficient and ensure your network configurations are clear and efficient. Happy networking!


0Comments